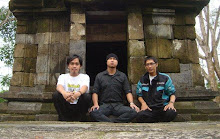
If you want to add a little bit of drama to your picture, then you should try to add a rain effect in its foreground. This is a 11 steps process which will not take you longer than 4 minutes once you get used to it. The picture is downloaded from deviantART and the credit fully goes to his author.
Kamis, 09 Desember 2010
rain effect to your picture(photoshop cs4)
 12.34
12.34
 pasang iklan gratis tanpa bayar/informasi candi/candi di indonesia/indonesian tample/cara/sejarah/kesehatan/budaya/fashion/
Step 1
Open the picture in Photoshop
Step 2
Create a new layer (Shift+Ctrl+N or go to Layer -> New -> Layer). Change the blending mode to Screen. We will work with this new layer from now on.
Step 3
With the new layer selected, press Shift+F5, or go to Edit -> Fill and choose 50% Gray in the Contents drop-down menu.
Step 4
Go to Filter -> Noise -> Add Noise. I usually use a value around 18, but depends on your preferences. Make sure you check the Monochromatic option, otherwise your rain will be multicoloured, and you don't want this to happen.
Step 5
Select Shift+Ctrl+L or go to Image -> Adjustments -> Auto Levels to apply Auto Levels. This will make the rain more visible to help us in the future steps.
Step 6
Go to Filter -> Blur -> Motion Blur and while watching the picture in the background move the slide to any of the sides. You can also select the angle you want the rain to fall.
Step 7
Now we are going to adjust the density of the rain by using the Levels tool. Go to Image -> Adjustments -> Levels or press Ctrl+L and move the left and right sliders to the centre, like in the image below. Then adjust the density by moving the same sliders to their respective sides, but do not get them too far from the center.
Step 8 (optional)
Here you may want to thick the rain if you work with high resolution images. Go to Filter -> Other -> Maximum and adjust the rain until you get the thickness you want.
Step 9
Now we will blur the rain by using the Gaussian Blur filter. Go to Filter -> Blur -> Gaussian Blur and adjust the radius until the pixels disappear.
Step 10
You may find at the edges of the picturale box outside the picture until the glow disappears. I will not provide a screen because on the picture I've worked with doesn't appear any kind of glow.
Step 11
To finalize the effect and give the picture a sense of reality decrease the opacity as you wish.
Congratulations! You've completed this tutorial. Now that's how the picture looks:
Hope you enjoyed it. For any problems or concerns post a comment in the section below.
Langganan:
Posting Komentar (Atom)
 RSS Feed
 Twitter


0 komentar:
Posting Komentar